Braiding Leather Tutorial - How to Braid Leather With Three Laces
How to Braid Leather With Three Laces
This braiding leather tutorial will teach you how to create a decorative three lace leather braid. You can use this leather lacing technique to make a braided bracelet, belt, dog collar, or any other leather object.
We’ve made a video showing the complete leather braiding process, which you can find at the end of the blog post. Additionally this article includes written instructions and diagrams for reference.
You will need: a strip of tooling leather, 1/8 inch leather lace, and three two-prong lacing needles. Optional: garment leather for lining, and contact cement to attach it. Depending on your project, you may need other leather craft supplies such as rivets, D rings, snaps, and buckles.
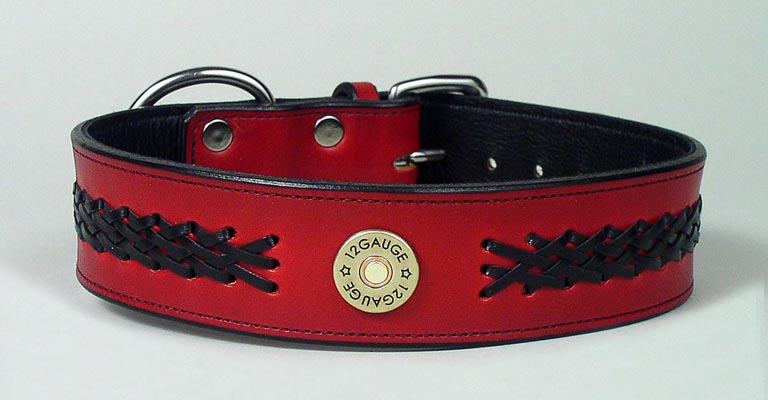
A three lace braid on our Concho Designer Braided Dog Collar
Preparing Your Leather
First, finish your natural tooling leather in whatever way you prefer. The leather in our dog collar in the photo above has been dyed, dipped in neatsfoot oil, polished with acrylic resolene, and coated with dubbin water repellent.
Punch holes in your piece of leather in the pattern shown below. You will need two columns of holes, spaced ½ inch apart, plus one extra hole between columns at the top and bottom of the braid. The holes should be as small as your needles and lace allow. We use a 3/32 inch hole punch for our leather craft projects.

A finished leather braid. Refer here for hole placement.

Reverse side of a finished leather braid.
Cut 3 strands of leather lace. Each strand should be 4 to 4 ½ times the length of the final braid. Use a knife or skiving tool to thin the ends of the laces, removing material from the rough sides so that they resemble the picture below. Next, secure the laces to the two-prong lacing needles by punching the prongs through the finished top sides of the laces.
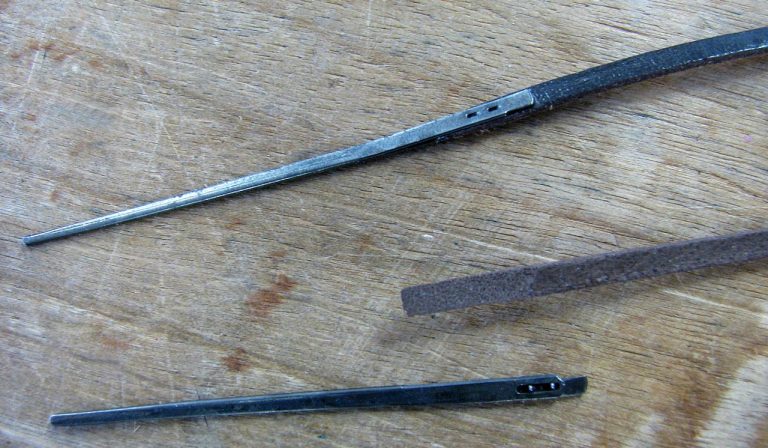
Attach two-prong lacing needles as shown to leather lace.
Starting the Braid (Step 1)
Thread the leather laces through the top three holes from the back (the unfinished leather side) to the front (the finished leather side). Leave about an inch of lace remaining on the back side.
Hold the leather so that the front side is facing you. Take the leftmost lace and weave it under the middle lace, and then over the right lace. Thread it through the third hole down on the right side of the leather strip. Make sure to leave the second row of holes open, as shown in the diagram.
Next thread the middle lace through the third hole down on the left. The lace which began on the right is now the new middle lace.
Turn your leather piece over. You should have two laces emerging from the third row of holes. Pull these laces back up to the second row of holes, and thread them through to the front.
This step will create two loops on the back side of the braid. Tuck the free ends of the laces into these loops to secure them.
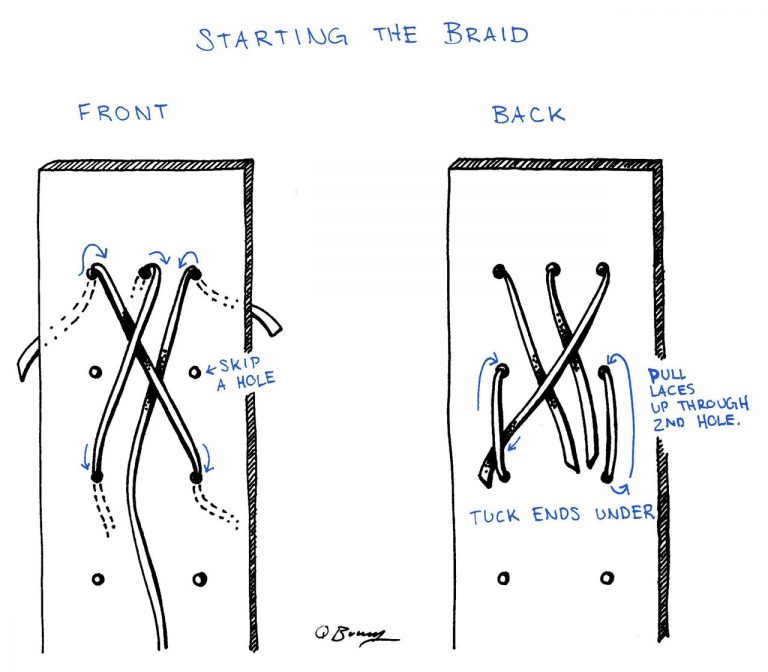
Braiding leather first requires securing lace ends under loops on the back side of the braid.
Braiding Leather (Step 2)
Begin to braid with the left most free lace (second left hole down from top) shown in diagram "Front-1" below. Weave that lace across the others following an "over, under, over" pattern, then thread it through the fourth hole down on the right side. Thread the middle lace through the fourth hole on the left side. The lace that began on the right will now be the new middle lace.
On the back side of the braid, bring the left and right laces up one hole and thread them through to the front. The laces will now be in their "starting position" again. Repeat step 2 until you reach the end of the braid.
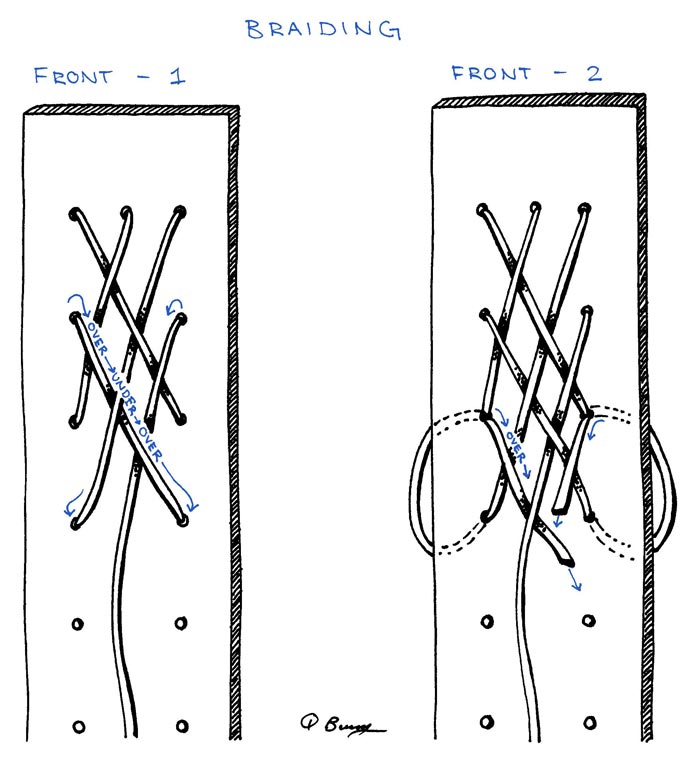
Follow an "over, under" pattern for this leather braiding technique.
Ending the Braid (Step 3)
When your leather braid is near the end, the three laces should line up with the bottom three holes. Thread them through, and turn the leather piece over. Tuck the lace ends into the nearest loops, the same way you did at the start of the braid. Trim any excess. Refer to the photo above showing "Reverse side of a finished braid," to check this step.
You can glue down the lace ends to make your braid more secure. Our finished braided products have a soft garment leather lining glued underneath, to hide and completely secure the underside of the braid.
The Video
This video shows our leather braiding technique in action. Watch to see how it's done, then refer to our diagrams when making your own braid.
Video tutorial on braiding with three laces.
The Finished Braid
The leather craft projects shown below are finished with the lace holes being 1/2 inch apart running down the length of the leather wristband and dog collar. If you want a tighter looking braid, you can make the holes 1/4 inch apart instead. However it will be much more time consuming to braid the leather lace, and it will take a lot more lace. We have braided the lace with both distances of hole spacing but prefer the 1/2 inch spacing.
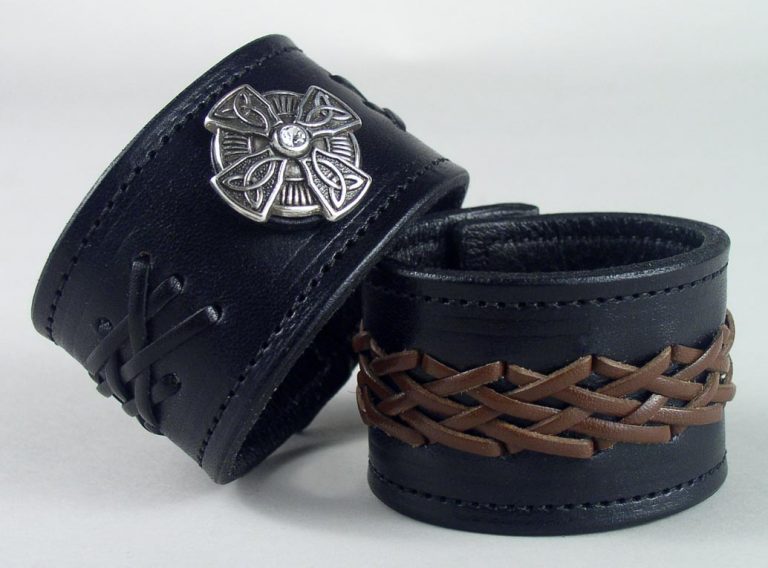
Braided leather wristbands.
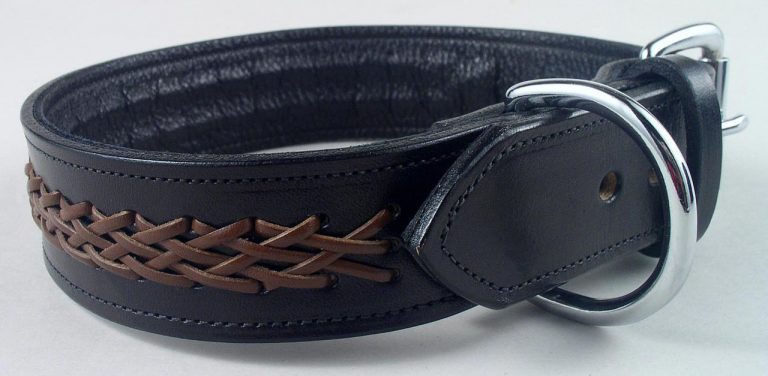
The finished braid on our Braided Leather Dog Collar.
If you make a leather project using this braid, please send us a photo to share on Facebook and let us know how it went for you!


