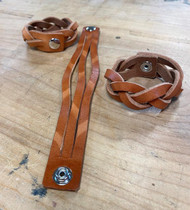
The Leather Magic Braided Bracelet
Have you ever wondered how to make a leather magic braided bracelet? Well, wonder no more! With both ends of the bracelet closed where the leather strands end, it seems impossible to even do a braid. Because of this, it is also referred to as a mystery braid bracelet.
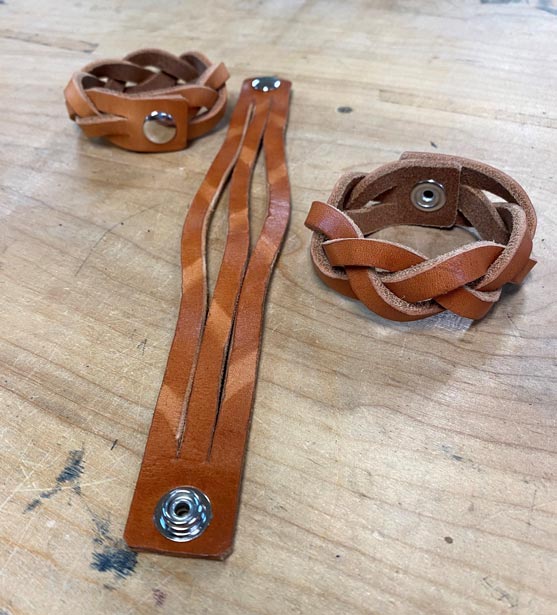
Coloring the Leather Wristband
For this leather craft tutorial, we start with natural undyed vegetable tanned leather. It is also referred to as natural tooling leather. To acheive this, we wiped pure neatsfoot oil onto the leathers surface to get the nice shade in the picture above. After that we applied a couple coats of Fiebing's Resolene to give it a nice sheen.
If you wanted to opt for a more coulorful bracelet, it is easy to do so. Using a folded a piece of flannel sheet, apply a leather dye such as Fiebing's Pro Dye, Fiebing's LeatherColors or Eco-Flo Leather Dye to the top surface. After that, pure neatsfoot oil or neatsfoot oil compound should be applied to both the top and bottom leather surface to return oils to the leather. The neatsfoot oil helps prevent cracking from leather possibly drying out and makes the leather more flexible. After allowing it to dry, apply a top finish for a nice shine such as Fiebing's Resolene. Between every application, make sure it is sufficiently dried before continuing to acheive the best results.
You could also of course start with a leather that is already colored the way you want. Chrome tanned leather is sold already dyed, colored, and polished so in that case you could have skipped all of these steps.
The leather industry continues to use an old thickness measurement called ounces (oz). One oz is equivalent to 1/64 inch thick. 5-6 oz (5/64 inch - 6/64 inch) thick leather makes for a nice manageable thickness to work with as well as for being comfortable. If you want a thicker looking braided leather bracelet, you could use 8 -9 oz (8/64 inch - 9/64 inch) but it becomes a little harder to braid. For a really flexible thinner wristband you could use 3- 4 oz (3/64 inch -4/64 inch) thick leather. Therefore the thickness of leather really comes down to your personal preference as quite a range of thicknesses will work to make your mystery braid bracelet.
Cutting Leather Strips for Braiding
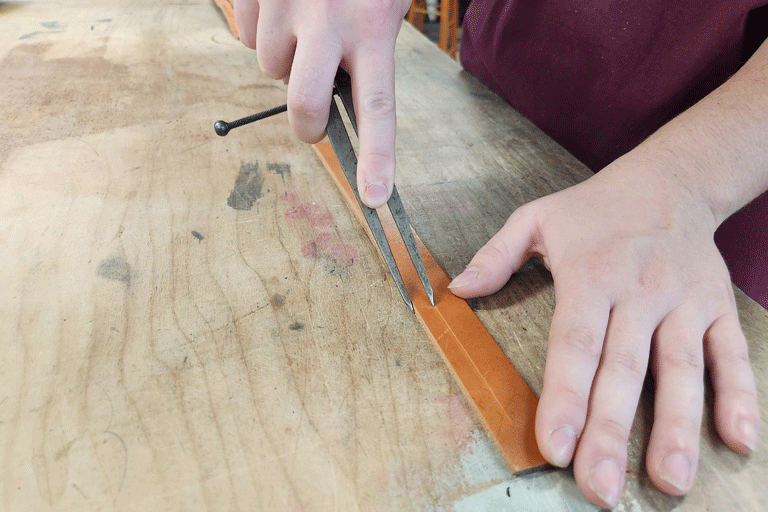
1) First, you will want a strip of vegetable tanned leather finished to your preference (dyed, polished, oiled, etc.). You are going to want to mark the leather strip in thirds by using a divider or ruler. You will want to give about an inch of room on each end for the fasteners of your choice such as a snap or button stud. For this example, we will be using jacket snaps for leather. Keep in mind that as you braid the wristband, the length will shorten the finished bracelet. For example, if you make the strips 9 inches long, after you complete your braiding, the distance may end up between 7 1/4 inches to 8 inches depending on how tight you make the braids. Therefore, some experimentation may be required to get the desired length of your magic braided bracelet.
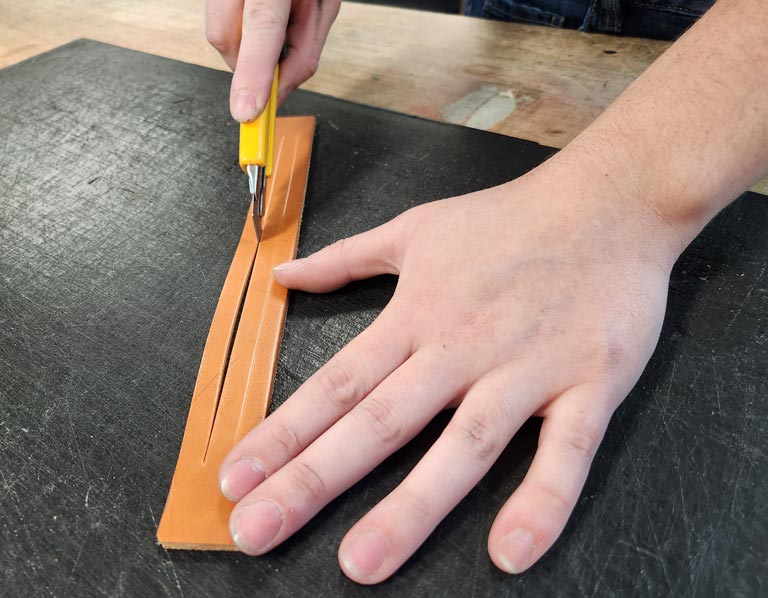
2) Once the impressions have been made for the strips, you will want to make the cuts with a utility knife. Place the leather on a poly cutting board or poundo board and cut the leather into three strips stopping about 1 inch from each end.
Braiding Steps for Leather Magic Braided Bracelet
3) Now you will want to hold the strap of leather vertically, taking the right strand and placing it over the center strand.
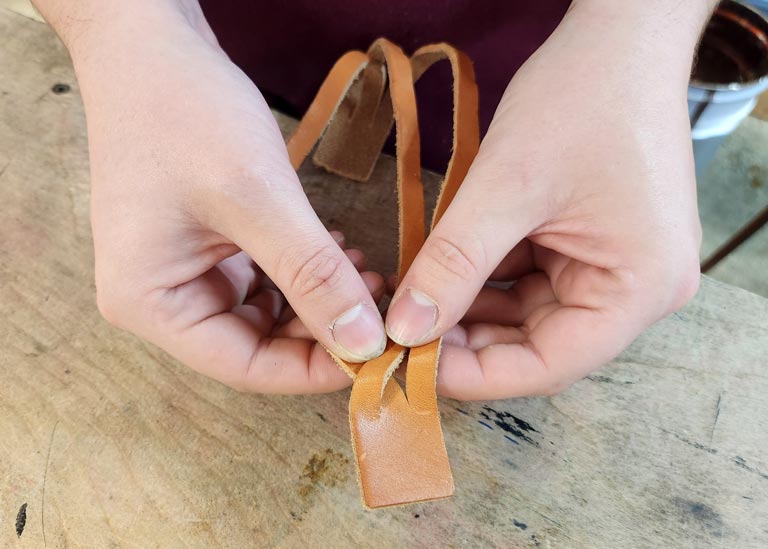
4) Then place the left strand over the center (formerly right) strand.
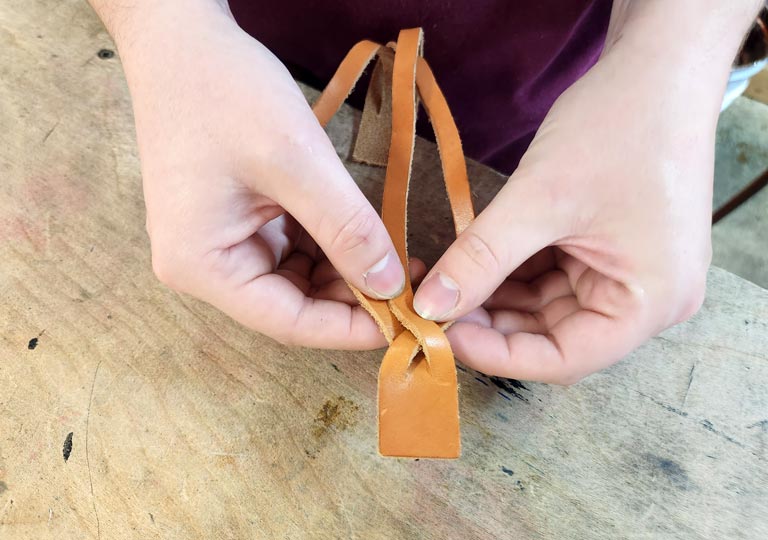
5) While maintaining a grip on the top of your bracelet to maintain the start of your braid, take the end of your leather strap and turn it into the rightmost slot of the leather bracelet
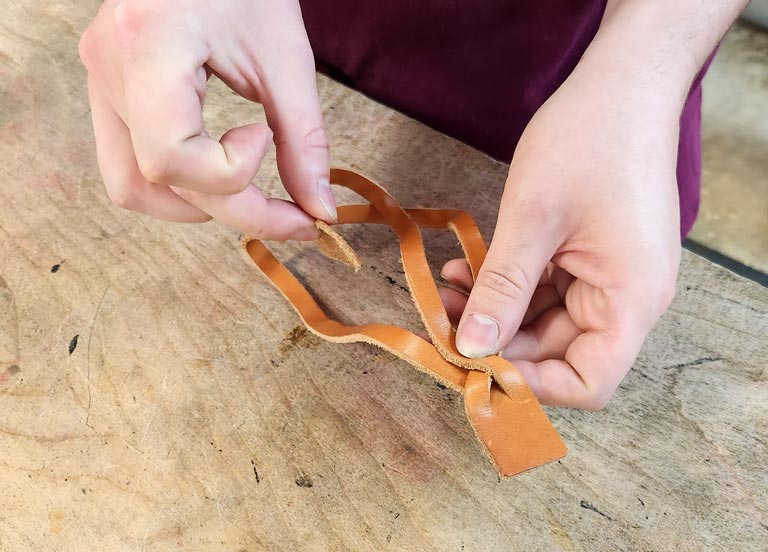
... and pull it through all the way through the slot.
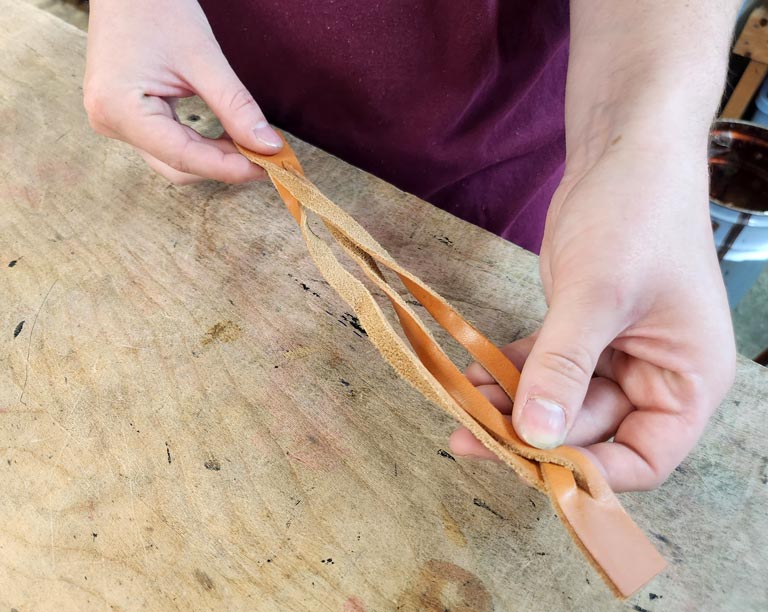
6) Returning to your braid, you will want to continue with the right strand over the center strand and then the left strand over the center (formerly right) strand.
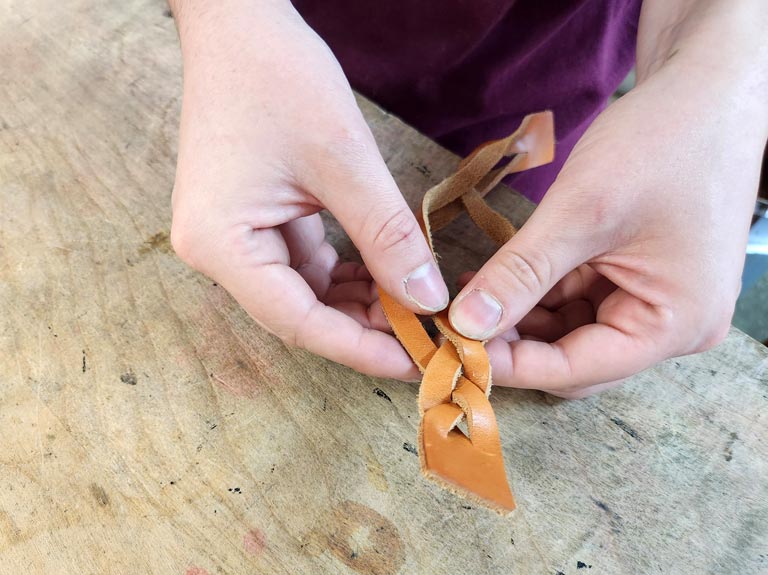
7) You will then want to take the bottom and push it through the leftmost slot.
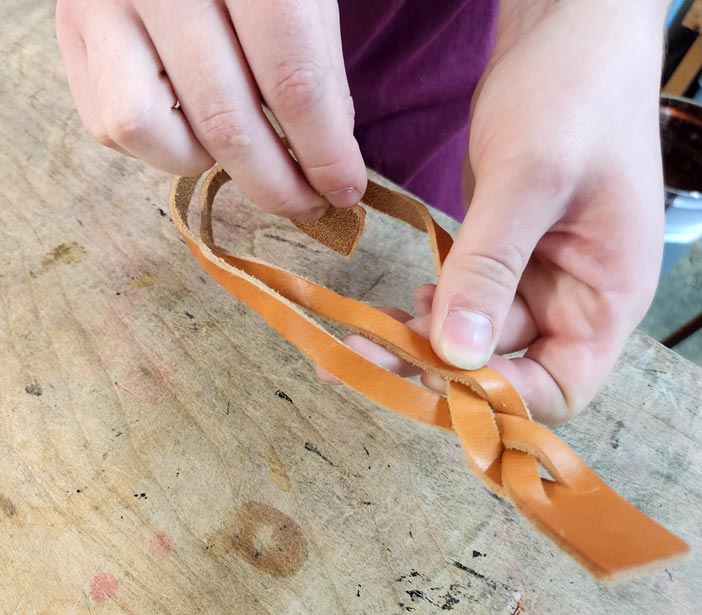
... and pull it all the way through.
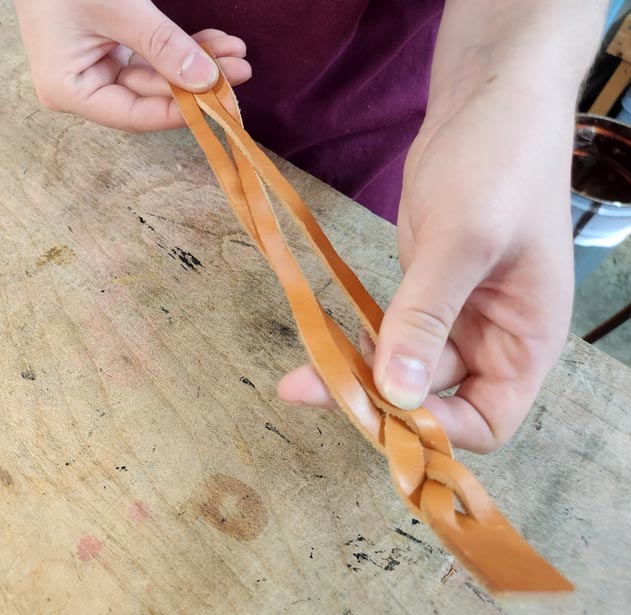
8) Right over center, left over center, right over center, left over center to complete the braiding sequence.
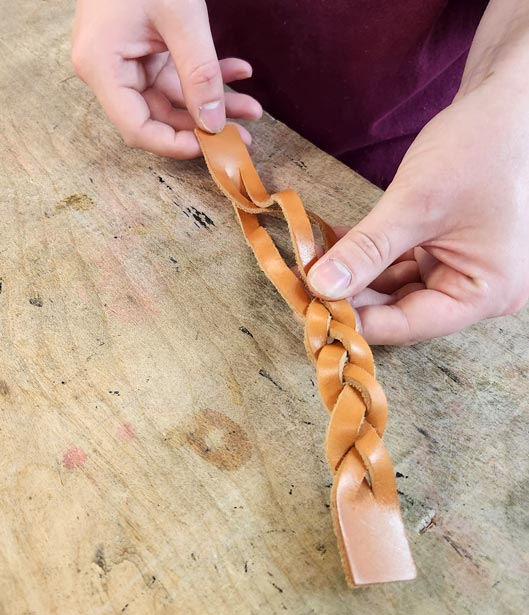
9) At this point if you have space, you are ready to start at step #3 again and proceed to step #8 to complete a second leather braiding sequence.
10) Depending on the thickness and the length of the leather as well as if there is any more space left for braiding, this might be the last step of the braiding process before evening out the leather braid. If there is still more space to do another braid sequence, repeat steps 3 to 8 as needed.
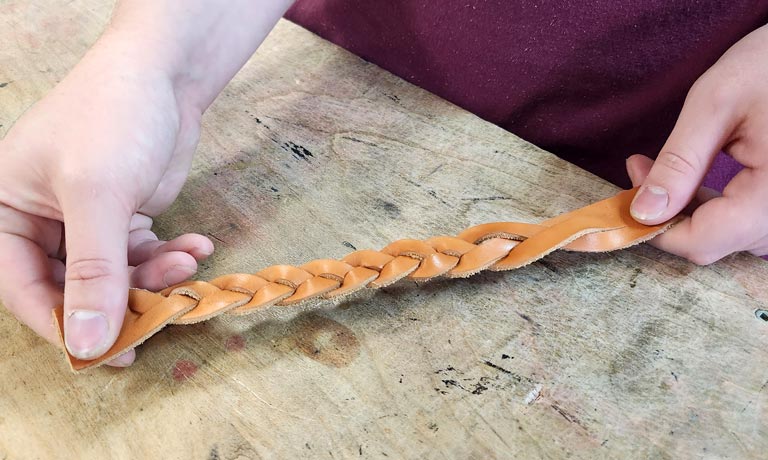
11) The braid may be tight on one end and loose on the other so you will have the work the tautness of the braid evenly over the entire length of the leather for a nice finished braided wristband. Even out the braid by pulling the strands, bottom to top until the strands appear to be evenly distributed.
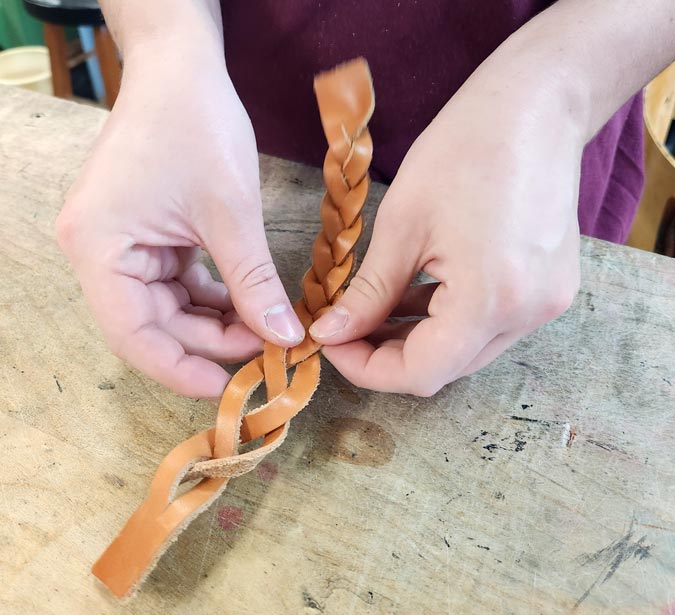
Setting Snaps in Mystery Braid Bracelet
12) Once you have a nice even braid, you will want to get those snap setting tools out. First, mark where you want your snap holes to go.
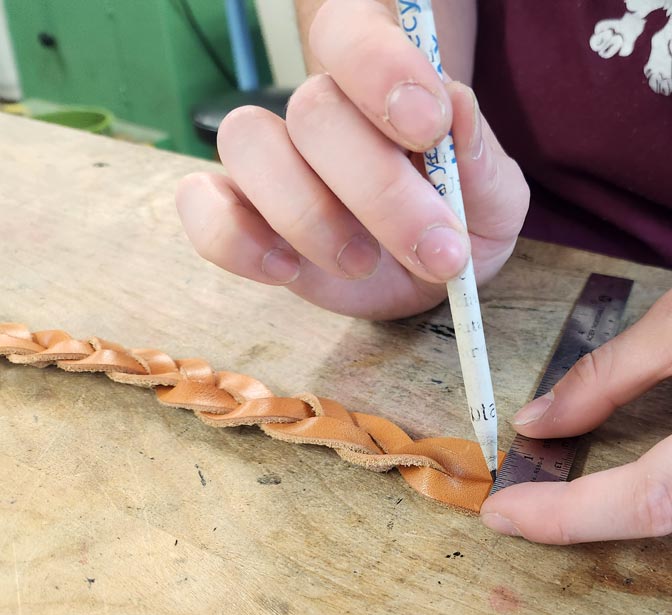
After you have marked your leather, it does not hurt to wrap the bracelet around your wrist, overlapping the two spots you have marked to assure a proper fit.
13) Next you can punch the holes on each end with a proper sized round drive hole punch, making sure that they line up when overlapped. When punching the holes, we recommend having a piece of scrap leather underneath your project if you don't have a poly cutting board or a poundo board to avoid damaging your hole punch tool. It is also recommended that you do not use a metal hammer to tap down on your metal drive punch as this will cause the end to mushroom over time. You could also use a rotary punch for making snap holes which is like a plier with hole punches if you so choose.
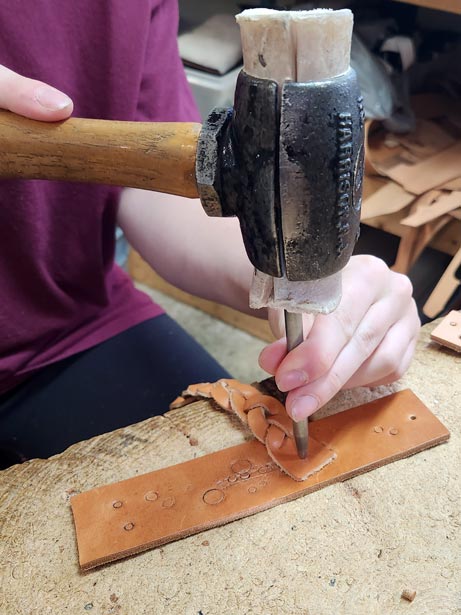
14) Now that your holes are punched, it is time to set the snaps! For this you will need your snap setting tools (snap setter, dot, and rivet anvil,) a non-metal hammer or mallet, a solid service (a mini anvil is a great option,) and your snaps. For more detailed information or to revise yourselves on setting snaps, feel free to check our blog on how to set snaps in leather. In the photo below you can see the socket of the snap being set to the snap cap.
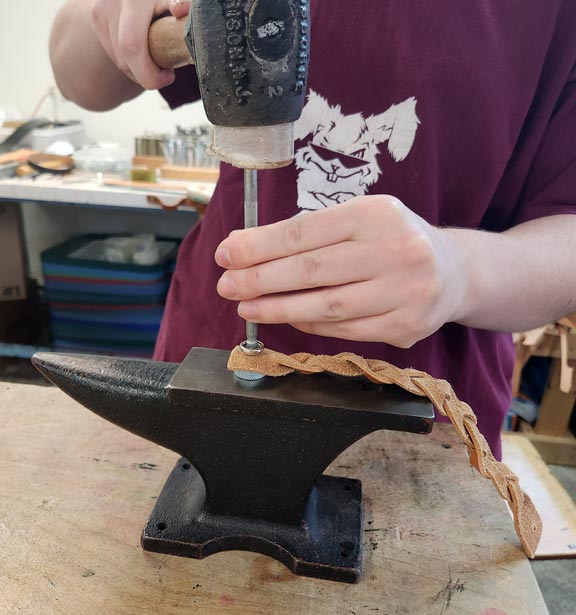
Below the stud part of the snap is being set to the snap post.
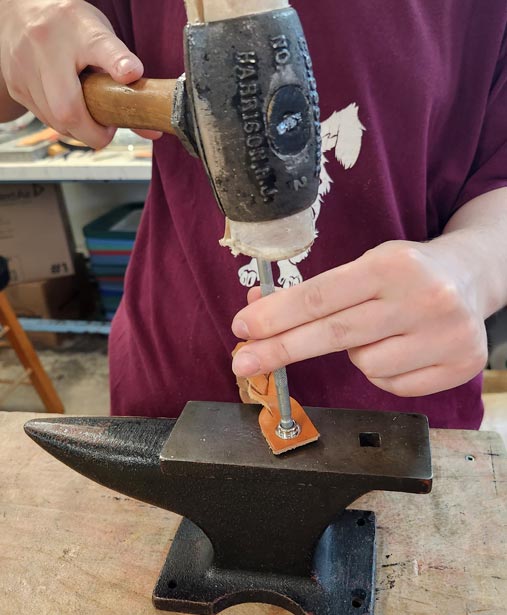
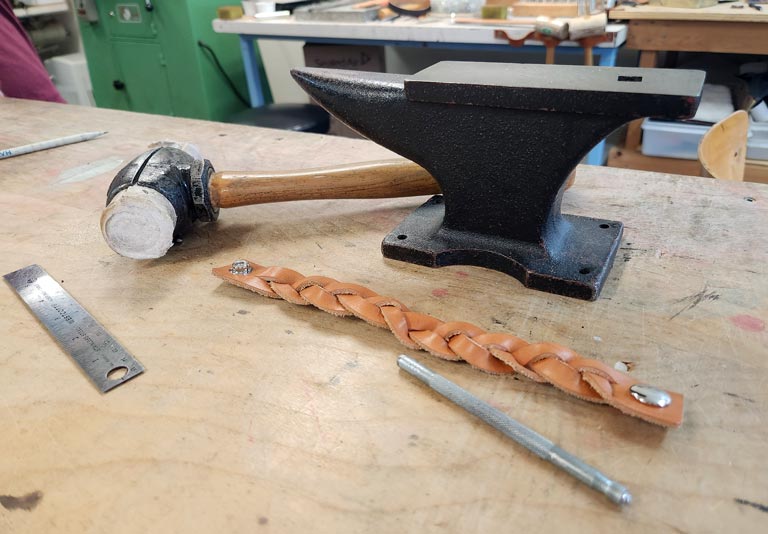
And there you have it! Your very own magic braided bracelet is completed that that will wow all your friends.
If you want to learn more about the magic braided bracelet and see the magic unfold right before your eyes, feel free to watch our following YouTube video on the Magic Braided Leather Bracelet:

