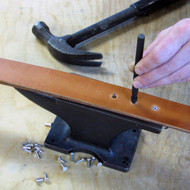
How To Rivet Leather
Types of Leather Rivets
Learn how to rivet leather with the different types of leather work rivets. Instructions are given for setting the four most common types: rapid rivets, double cap rivets, tubular rivets, and copper rivets. At the end of the post are tips for removing rapid rivets and double cap rivets.
Rapid rivets (single cap rivets) are the most versatile and commonly used in leathercraft projects. Double cap rivets are a more heavy-duty alternative, and are finished with a cap on the bottom as well as the top. We install rapid rivets on our belts and double cap rivets on our standard dog collars.
We also use tubular rivets and solid copper rivets for leather, which are even stronger and have a more utilitarian look. These require different types of rivet setting tools from common rapid rivets or double cap rivets. We use tubular rivets on our tough dog collars and industrial belts, and copper rivets on some custom tool cases.
Depending on your application, it may also be important to consider the type of metal in the rivet. Solid brass rivets and copper rivets won't rust if they are constantly subjected to rain or lakes, but steel rivets will eventually rust.
Rapid Rivets
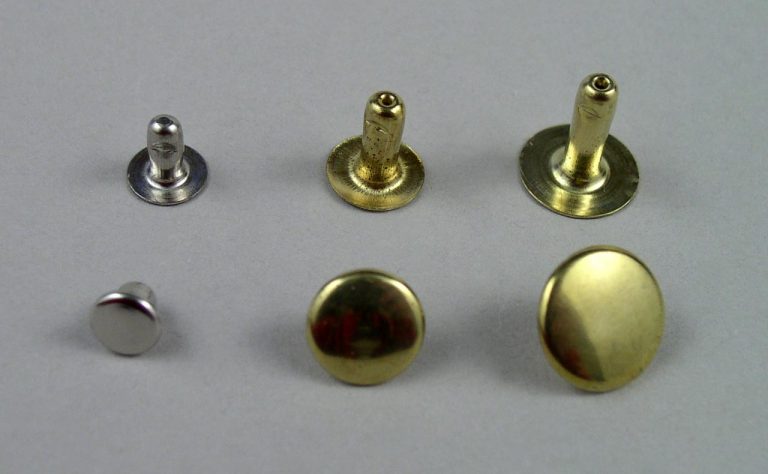
Rapid rivets: caps and posts. Rapid rivets are the most common rivet type.
Punch a hole in the pieces of leather you’ll rivet together, in a size close to the diameter of the rivet posts. We use a 1/8" diameter drive punch for most of our rivets, and smaller punches for our small and extra small rivets.
Take the post, which is the piece with the long shank on it, and push it up through the hole. Then take the cap, the finished piece, and place it on top of the post. The rivet post should stick out three millimeters (1/8 inch) or less above the top of the leather. If your post is at or below the level of the leather, the rivet won't crimp properly. If your post is too long, the rivet will set but may set crooked. When choosing a rivet size, use the smallest post length that will work.
Place your leather item on an anvil, with the cap side of the leather facing up. Our anvil sits on a solid wood stump to prevent it from bouncing. However, you can also use a mini rivet anvil for this or any other clean flat smooth solid metal piece. Place your anvil on a sturdy surface such as a workbench.
Position the rivet setter on top of the rivet, concave side facing down against the rivet cap. This allows the cap to stay curved. Hold the setter straight upwards and give it a few taps with a hammer. Check that your rivet is set securely.
If you are just starting leatherwork, you might only want a small variety of leather work rivets for different thicknesses of leather. Rivet setter kits are available which include the leather rivet setter and different lengths of rapid rivets. This is an easy way to familiarize yourself with how to use leather rivets and get accustomed to different post lengths for different leathercraft projects.
Learn how to rivet leather with double cap and rapid rivets in this tutorial video.
Double Cap Rivets
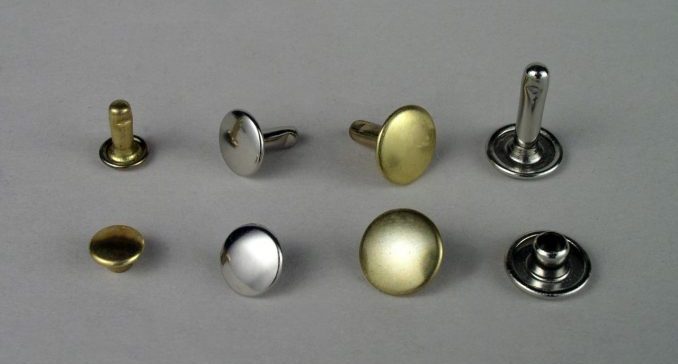
Double cap rivets: caps and posts.
If you want a heavier duty rivet you can choose one with a double cap. These are a little more expensive, and have a finished cap on the bottom as well as the top.
If you want the bottom to stay curved, you can set your rivet on top of a rivet anvil setting plate, over the appropriately sized indentation. If you want to flatten the bottom you can set it directly on your flat anvil, as with the rapid rivet.
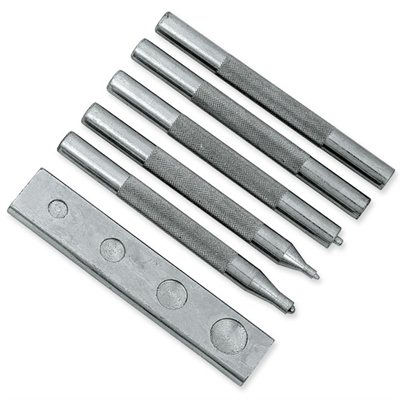
On the left is a setting plate for double cap rivets.
From here the method is the same as with the rapid rivet. Use the same setter, line it up perpendicular to your leather, and hammer down on the rivet.
A Simpler Rivet Setting Alternative
You don’t need a setter to set rapid and double cap rivets if you’re not interested in preserving the curved cap shape. You can set them with just a hammer, which will flatten them against the leather. This is a good option if you’re making something functional, like a tool holder. The rivet will be just as strong as one set with a setter.
You can use any hammer for this, but we use a leather working hammer or a cobbler's hammer. These specialty hammers have a slight curve to the head, so when you tap the rivet head or piece of leather, it won’t leave a mark in the leather.
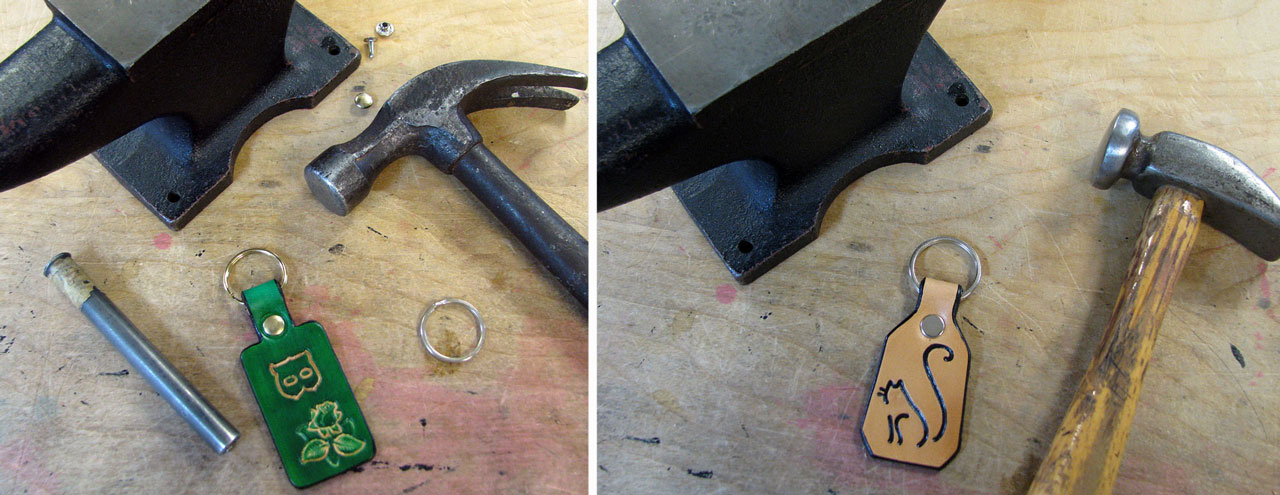
Left: rapid rivet set with setting tool and carpenter's hammer. Right: rapid rivet set with leather working hammer.
Tubular Rivets
The posts of tubular rivets are much thicker than rapid and double cap rivet posts, making them ideal for industrial applications. The post is solid part way up before it becomes hollow, giving it more strength.
We set our tubular rivets using a kick press, which lets us set a cap on them. The finished look is similar to our double cap rivets. However, you can set them by hand without a cap, by using a peening tool. This tubular rivet tool will 'starfish' the underside of the rivet, as shown below.
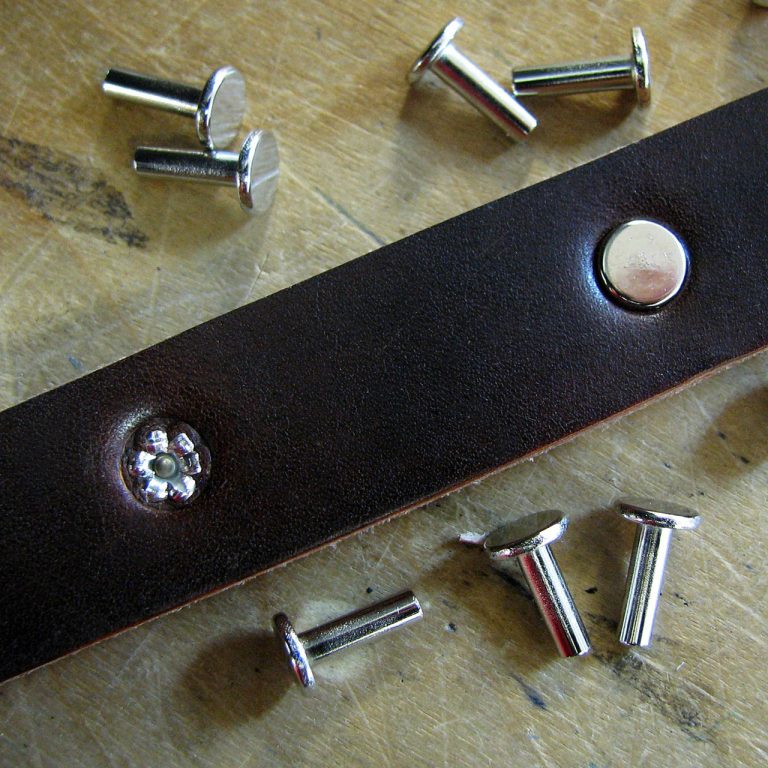
Tubular rivets set with a peening tool, top and bottom.
As with rapid and double cap rivets, the post should extend past the surface of your leather by 3mm (1/8 inch) or less. If the tubular rivet extends to far above the leather, it will cause the rivet to bend and set crooked.
Place the rivet head flat against your anvil. Hold the peening tool perpendicular, with the point in the hollow at the center of the rivet post. Hammer down firmly to set your rivet. Rawhide mallets or poly mallets prevent the end of your rivet setting tool from mushrooming out over time. A metal hammer will tend to mushroom the end of your rivet tool; but if you aren't riveting too much, just use a regular metal hammer.
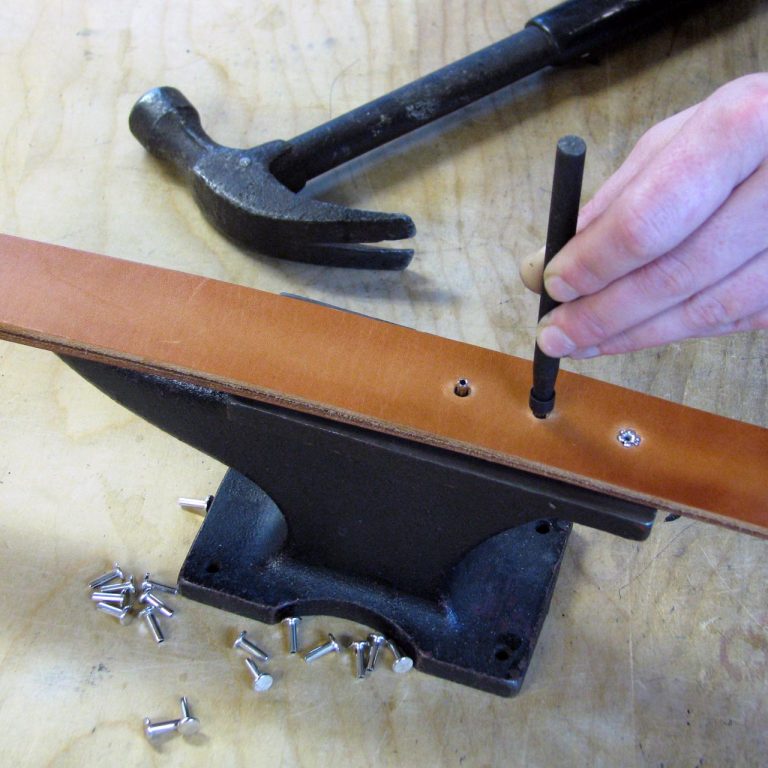
Hold your peening tool perpendicular to the leather and hammer down.
Copper Rivets
Copper rivets allow more flexibility with post size and material thickness, since you will be trimming the post end rather than crimping it. The post length you choose should be at least 3/16" longer than the thickness of your material.
Either side of the finished copper rivet can face "out," depending on what look you want. You may prefer to have the smooth, flat surface or the domed, burred surface facing out on your finished leather product.
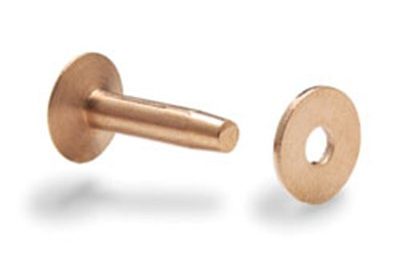
Copper rivet post and burr.
Place the post flat against your anvil and slide the burr down the post as far as it will go.
Slide the hole on your copper rivet setter over the rivet post, on top of the burr. Hammer down firmly until the burr (washer) is flush with the leather, and remove the setter.
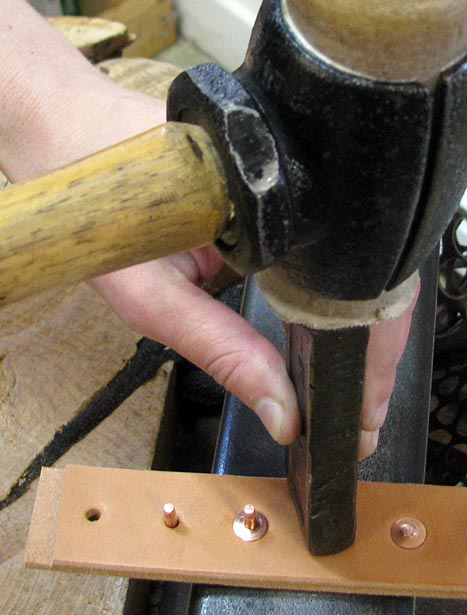
Hold the copper rivet setter perpendicular to your leather and hammer down.
If your copper rivet has a short enough post, you may not need to trim it. If the post extends more than 1/8 inch above the surface of the burr (washer), use diagonal cutting nippers to cut it to 1/8 inch.
Place the domed area of your copper rivet setter over the trimmed post, and hammer down firmly. This will dome the top of the rivet, so there will be no sharp edges.
You can stop there as it is plenty strong, or you can hammer the domed top flat with a hammer. This will make the rivet slightly stronger, and there won't be a lip around the rivet dome to catch on anything. The domed look has a cleaner looking finish, whereas the hammer tap gives more of an old fashioned, hand-hammered effect.

The 6 steps of setting a copper rivet. You can finish at either steps 5 or 6, depending on the look you want.
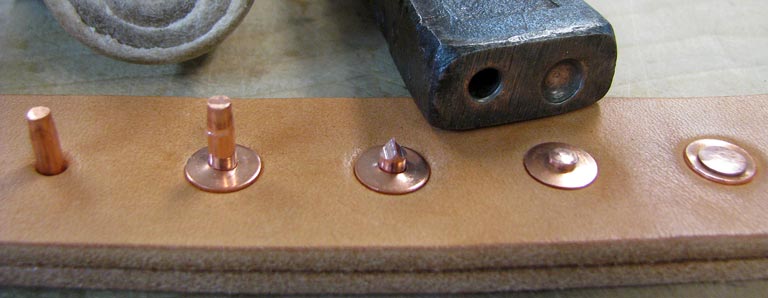
The second-to-right rivet was domed with the copper rivet setter. The far right rivet was hammered flat after doming.
Removing Rapid Rivets & Double Cap Rivets
I mentioned earlier that a rivet won’t set securely if the post is too short for the leather. A rivet with a post that’s too long is in danger of setting crooked. This means the post will go sideways, and the top and bottom caps won’t be lined up. Improperly-set rivets can be removed with a drill.
We use a drill press. Place your item on the press, cap side down for rapid rivets. Choose a drill bit slightly bigger than the hole on the post side. On double cap rivets you have no choice but to drill through a cap, which is harder since there is more metal to remove.
Line up the drill bit with the center of the rivet. Turn the machine on, running at a slower drill speed. Then lower the drill slowly onto the rivet.
Don’t press down hard. Allow the drill to gradually eat away at the top layer of metal. When the rivet starts to spin, turn the press off. Wait a moment before handling your item, as the rivet will be hot. Also be careful of sharp pieces of metal.
At this point you may be able to pull the rivet apart. On rapid rivets, the bottom of the post often comes right off with the drilling, and then you can push the rivet out with something narrow like a nail. On double cap rivets, you can try using a screwdriver to pry the cap off. Insert it between the layers of leather before attempting to pry directly under the metal cap, and be careful not to damage the surrounding leather. You can also try to snip the cap off with shoemaker's pincers. If it’s still firmly attached, you’ll need to re-set the rivet cap with your hammer to keep it from spinning, and try again with the drill.

