
Setting Spikes in Dog Collars
Materials and Tools To Set Spiked Dog Collars
Setting Spikes can add a fun, edgy touch to your dog collar, wristband, or various other leather projects. In this leatherworking tutorial, we will teach you step by step how to set rivet spikes. The reference photos are of a dog collar with spikes, so that is the language that will be used throughout this article. However as mentioned, the steps can be applied to whichever project, you are hoping to set spikes in! If you choose to put spikes in a wristband, check your local laws first, to make sure it is not illegal to wear spiked wristbands.
Prior to setting spikes in dog collars, make sure you have already applied dye, oil, polish and water repellent to the leather. You can choose to either attach the roller buckle, loop and D ring before or after setting the spikes, however doing this before is a bit easier.
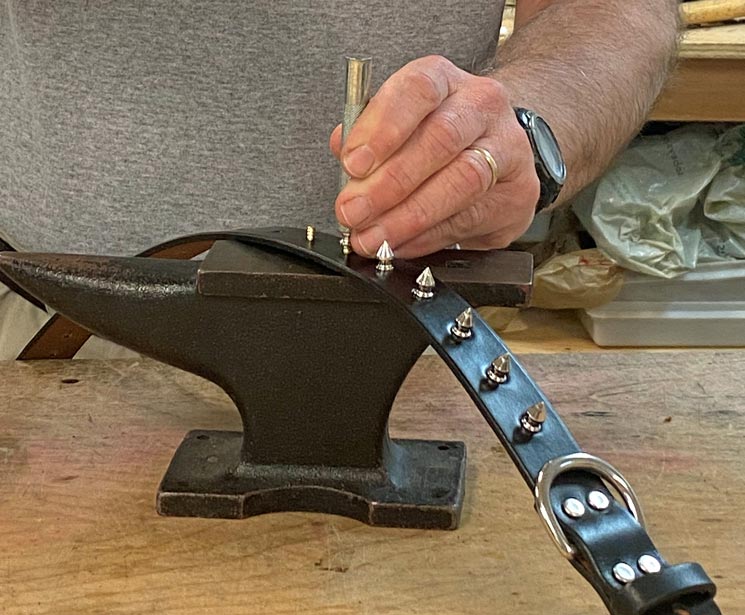
Setting small spikes in leather dog collar with a small spike setter.
Leathercraft supplies you will need:
- Package of small spikes or large spikes for leather
- 1/8-inch round hole drive punch
- Thick scrap leather or poly cutting board
- Small spike setter or large spike setter tool
Spike setting requires such items as an anvil, small spike setter, mallet, small spikes, and ribbed rivets.
Punching Holes For Rivet Spikes
In order to set your spikes, you will need to punch round holes in the leather with a drive punch where you want the spikes to go. We recommend measuring and marking the spots where you want the spikes to go, prior to punching the holes. You can do this with an awl, or you can lightly press your drive punch down on the preferred spots to create a guide.
After you have measured and prepared your hole placement, you can now punch the holes. Make sure you have a hard flat surface to do this on. We also recommend putting a piece of thick scrap leather or a poly cutting mat underneath the dog collar when punching your holes to protect your sharp drive punch. For the punch, we use a 1/8-inch drive punch but if you are unsure which size you need, do a hole test size on a scrap piece of leather. Once you are ready, place the drive punch on the marked areas, hold it securely and hammer down.
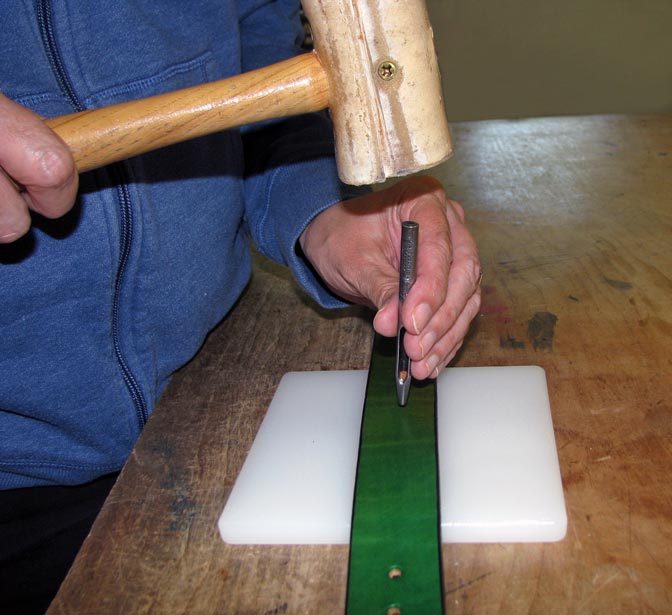
Punching holes for spikes with a round hole drive punch on a poly cutting board.
Different Types of Spike Setter Tools & Spike Sizes
Now that your leather dog collar has all the holes punched where you want your spikes to go, it is time to set these permanent spikes!
*You can either go with small or large spike sizes which are set in the leather permanently. Some refer to them as rivet back spikes. We also carry hexagon screw back spikes. However these hexagon spikes are held in place by a screw which makes them removable from or added to your leather project with the use of a screwdriver.
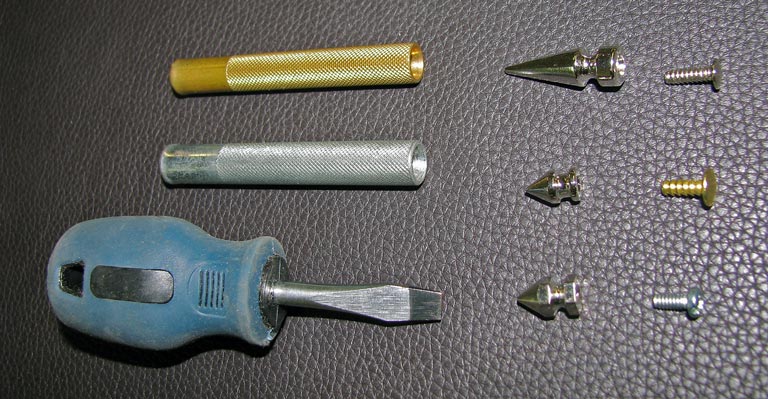
From top to bottom: large rivet spike, small rivet spike, hexagon screw on spike with appropriate setter tools.
Steps To Set Rivet Back Spikes
1. Take the ribbed rivet post and put it up through the back of (un-finished side) of the dog collar.
2. Next, place the collar on a sturdy anvil (or metal surface) with the post sticking up through the hole.
3. Put the spike on top of the ribbed rivet post, and then place the concave end of the spike setter on top on the spike. Make sure you have the appropriate setter for the spikes you are using. i.e., small setter for small spikes.
4. Tap down on the spike with a hammer or mallet to secure the spike to the post.
5. Repeat steps for the rest of your spikes!
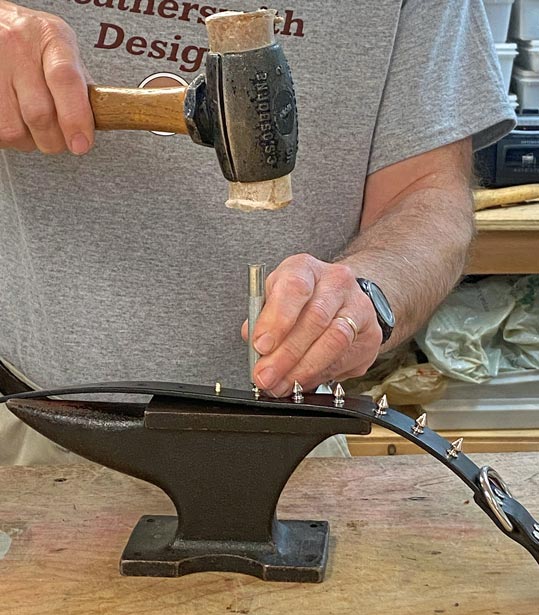
The spike setter tool fits over shape of the rivet spike and is struck with rawhide mallet.
Tips For Setting Spikes In Leather
It is best to use a poly mallet, rawhide mallet or wooden mallet as opposed to a metal hammer when striking the spike setter to make to make the setting tool last longer. Overtime, striking the metal spike setter with a metal hammer could eventually cause the end of the setting tool to mushroom which could cause a piece to break off.
When making your leather spiked collar, the ribbed rivet must stick through the leather enough above the surface to be able to grip and set inside the spike. Our 1/2-inch small spike and our 1 1/4-inch large spike can set in leather thicknesses from 2 oz to 13 oz (1/32 inch to 13/64 inch).
Enjoy watching the following leathercraft tutorial video showing some of the spike setting processes already discussed. When setting the leather spikes or punching holes, it is best to do so on a sturdy work surface that does not have bounce. In the video, you can watch us doing the leatherworking on a sturdy tree stump and a rugged work bench.
Video showing small spikes being set in a leather dog collar.
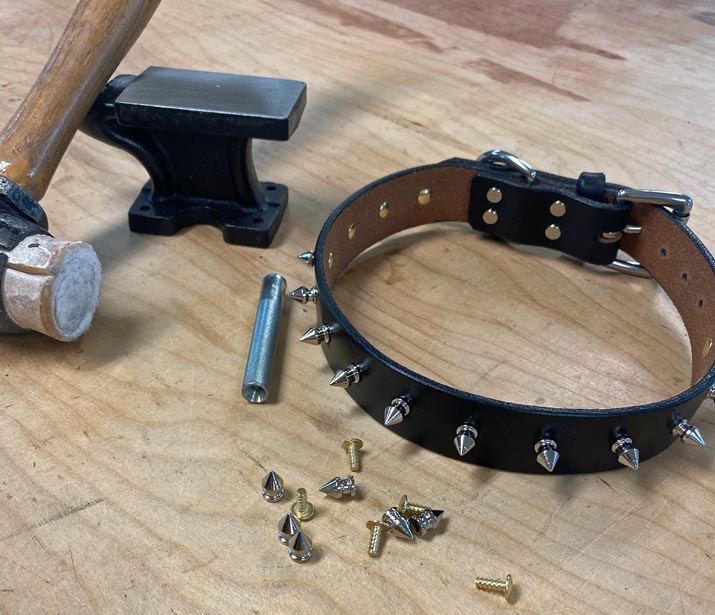
The Finished Leather Dog Collar With Spikes
Feeling overwhelmed? Not to worry! You can always order a spiked dog collar from us, and we’ll do all the work! The picture below is adorned with 1/2-inch permanent spikes.

Finished spiked leather dog collar.


