Finishing Leather Edges
Quality Increased by Finishing Leather Edges
When I was in my early teens, I first discovered the importance of finishing leather edges well. The finishing methods learned and discussed in this article apply to vegetable tanned leather which is a firmer leather as opposed to soft garment or soft bag leathers.
In the 1970’s, while still in Junior High School, I was selling my leather goods at the Festival of the Arts. A stranger commented that he liked my work. However he nicely pointed out that if my leather edges were smooth where the leather was sewn together, it would add to the overall quality.
It turned out that this stranger was the internationally recognized leather sculptor Rex Lingwood that was living in Halifax at the time. His sculptures have been exhibited widely in North America, Europe, Great Britain and Australia in both group and solo presentations. I also proudly own a leather craft book he wrote called “Leather In Three Dimensions”. When I asked for some suggestions, he kindly invited me to visit his studio and he shared some edge finishing techniques with me. The main thing I was neglecting to do was sand my edges smooth.
Sander For Finishing Leather Edges
Over the years since then, I have had different pieces of equipment set up for sanding leather edges by various sanding drums. Some drums were home made wooden wheels with foam and sandpaper attached that my Uncle Clint Wilson made for me on his lathe. At one point I even bought a 7 foot shoe maker’s finishing machine that had numerous wheels for working on edges. As my shop became more congested with tools and workbenches, I sold this large shoe repair leather edge finisher as it was taking up too much space for what I needed to do.
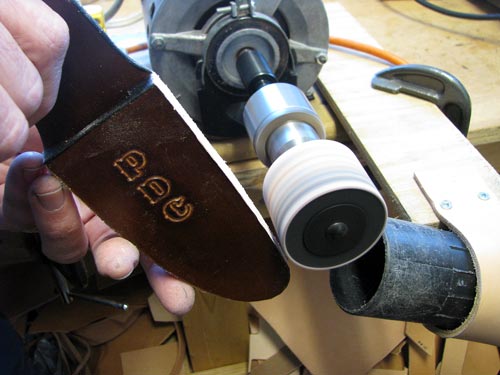
Finishing leather edges of knife case by sanding it smooth.
Twenty some years ago I converted a furnace blower motor into a edge finishing sander. I had asked a furnace repairman to save a motor for me when a furnace was being discarded. At the time I used a sanding drum from Sears. I bought a bunch of sanding sleeves at the time but many years later, when I tried to buy more sanding sleeves I found they were no longer carried for that size drum any more. Apparently Sears had discontinued that tool line.
I called many wood tool companies trying to find an alternative and got great results with Lee Valley Tools. Bob who works at Lee Valley Tools in Halifax came up with the solution for me when he asked what I was trying to do. He sold me a nice drum set kit and a shaft adapter. He suggested I could pick up a 1/2 inch drill chuck from Princess Auto since he no longer carried them. I wanted to continue to use my motor and hold my leather products vertically to sand the edges. I suppose I could put a sanding drum in a drill press and run my work horizontally but I was used to finishing leather edges this one way for decades. As well, I was used to seeing work held vertically for sanding at a shoe repair shop I used to visit regularly after school when I was a teenager.
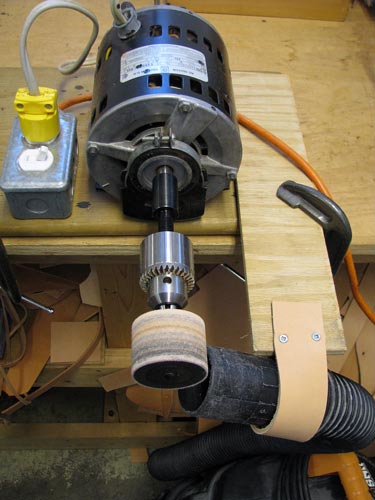
Motorized drum sander made for finishing leather edges.
This homemade leather edge finisher that I use in my leather shop everyday consists of a furnace blower motor with an electric switch purchased at a hardware store for turning it on and off. An extension cord has been cut and attached to the motor so I can plug the motor into a wall socket. You can check with an electrician to do this as well as switching wires to change the rotation direction of the motor should you have to do so. The board is C clamped to a workbench for easy removal in case I need the bench space.
The shaft adapter attaches to the motor shaft with two allen key bolts. The drill chuck screws onto the threaded end of the shaft adapter. Choose a sanding drum size and sanding sleeve grit from the Lee Valley Tool kit and tighten it in the chuck with a drill key.
To cut down on leather dust from the sander, I screwed a leather strap loop to a piece of wood to insert my shop vac tube into near the sanding disc. I still advise using eye protectors and a shop mask even though the shop vac captures most of the leather dust from sanding the leather edges.
Some leather edge finsishing techniques shown in this video using a sanding drum.
Sanding drums eventually get clogged with leather dust when sanding leather edges and surfaces over a period of time. When the sanding drum gets clogged, it does not sand very well. Another leather worker told me rather than replacing the sandpaper, the sanding drum can easily be cleaned with a crepe block. I gave it a first try in this video and it works great making the sanding drum like new again. The crepe blocks can be picked up at such places as Lee Valley Tools or Busy Bee Tools.
Cleaning the sanding drum with a crepe block.
Beveling Leather Edges
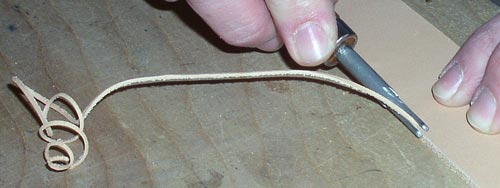
Rounding corner of leather edge with beveler leather craft tool.
After the edges are sanded, I continue finishing leather edges by rounding the corners with a beveling hand tool. The larger the number on the beveling leather tools, the more leather is removed from the corner of the edge.
Coloring & Burnishing Edges
The last step of finishing leather edges seems to vary from leather worker to leather worker. Each leather worker seems to have their own preference for coloring and burnishing the leather edge. There are a lot of leather dyes and finishes to choose from.
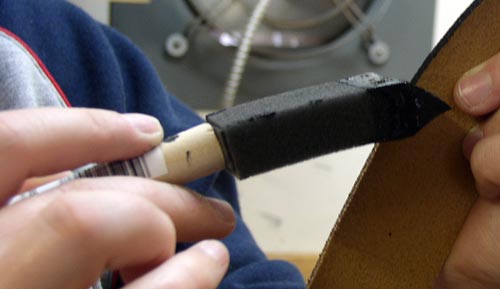
Applying Fiebing's Edge Kote with sponge applicator to leather edge.
I have used Fiebings Edge Kote for years to give a hard color leather finish. The leather can be smoothed down by burnishing the edge with a denim cloth that had been coated with beeswax. Burnishing is smoothing the leather edge with friction by rubbing it with a cloth in one direction for a number of times until smooth.
For years I used to attend craft shows where a fellow leather craftsman used to apply Fiebing’s Leather Dye to the edge of belts. Then he would rub paste saddle soap into the edge and burnish with a cloth. The edge was slicked very smooth with this leather edge finishing technique.
A saddle maker from years ago that had his leather carvings displayed in art exhibits used another technique that gave a smooth glass edge finish. He dyed the edge with Fiebing’s Leather Dye. Then he dampened the leather edge with water and slicked it numerous times with denim or waxed paper.
When I used to visit shoe repair shops, they would use an edge ink on the edge of the shoe’s sole. This edge ink contained a wax that made a smooth waxed edge when the inked leather sole edge was heated from the friction of a rotating rubber finishing wheel.
Some leather workers even made their own finish from a mixture of corn starch and water which they applied to the dyed leather edge. Other leather crafts people use acrylic leather paint while others just apply the leather dye without doing anything else.
If the leather edge is nice and smooth, you have lots of leeway in developing your own personal preference for finishing leather edges with different dyes, waxes, finishes and burnishing techniques. A well finished edge improves the overall look of your leather craft project.

